Showing posts with label frame. Show all posts

Wednesday, September 2, 2015

Goodwill "Framed" Wreath

Goodwill is always my store of choice when looking to up cycle anything and everything-

So, when I saw this large wooden frame, my first thought was I can make a rustic wreath for the front door-


Starting off with a thrift store frame, any size will work- I chose to make mine vertical vs horizontal because the frame is about 14" x 18".

The next step is to decide if you want to cover the whole wreath or accent a side.
This is one I made covering the whole frame-


so this time, I chose a one sided framed wreath.

I started with green leaves, vines, pods, sticks, and my glue gun!


Little by little, I added more-


I filled the vertical space, up and down


After finishing the side, and hanging it up, I like it hung the horizontal way!  Which way do you like it?

Take care, gotta fly-
Claire


Monday, March 10, 2014

Goodwill 50th Birthday Decorations


So, my little sister was turning 50, 
and we threw her a big ole' surprise party-


Fun to plan but boy was it hard to keep secret!!

Everyone likes a party 
and I love the planning,
 decorations and tablescapes-


Having a party in your home 
is always a great motivator in fixing up your place when 
company's coming-

Lots of secret texts and calls
 filled the last couple of weeks!

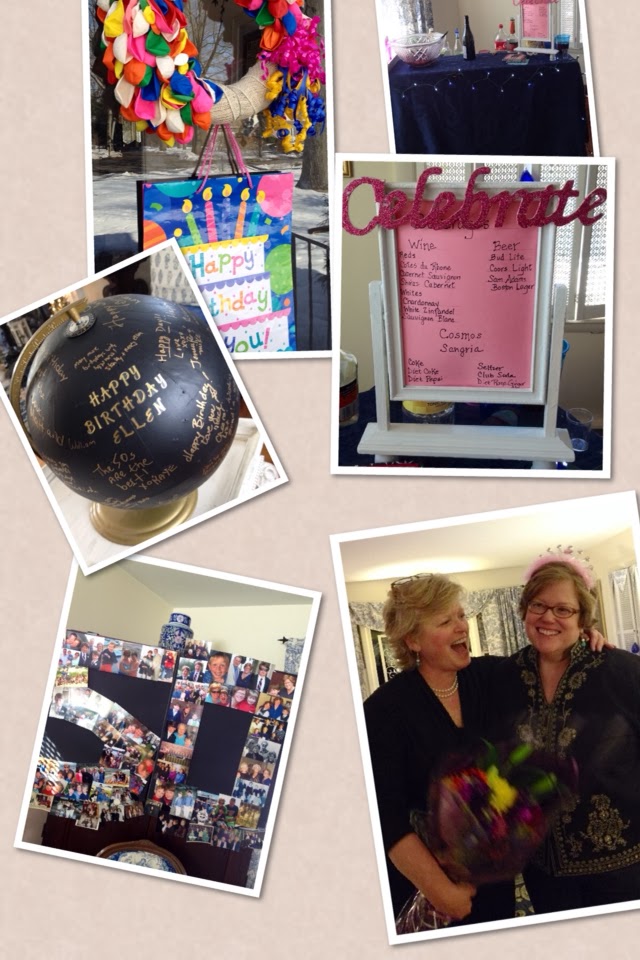
Every party needs a welcome sign or wreath-
I saw this idea on Pinterest-

I found a straw wreath at GW,
balloons at the dollar store-
and floral pins were a deal at Walmart-

This wreath couldn't be easier-
the simple supplies


Push the deflated balloons into the straw wreath-


Take a few and bunch the together-
I added a section of burlap for more texture


Curling ribbons added a touch of whimsy and 
celebrates the day!


A cute, simple welcome to the big party!

 I found a few more things at "my" Goodwill-outlet-

A beat up globe-


After cleaning it off, I painted it with chalkboard paint-


Gold stickers welcome the party guests and 
"Happy Birthday Ellen" was the starting point- 

 As guests arrived, I asked them to sign the globe
 with gold markers and at the end of the party, 
she had a "world" of memories!

An empty spinning frame-


I painted it white, added some unpainted candle cups
 and glued them as feet-
 I glittered a wooden Celebrate sign to top it off-
 inside the frame was a list of drinks 
available during the evening-


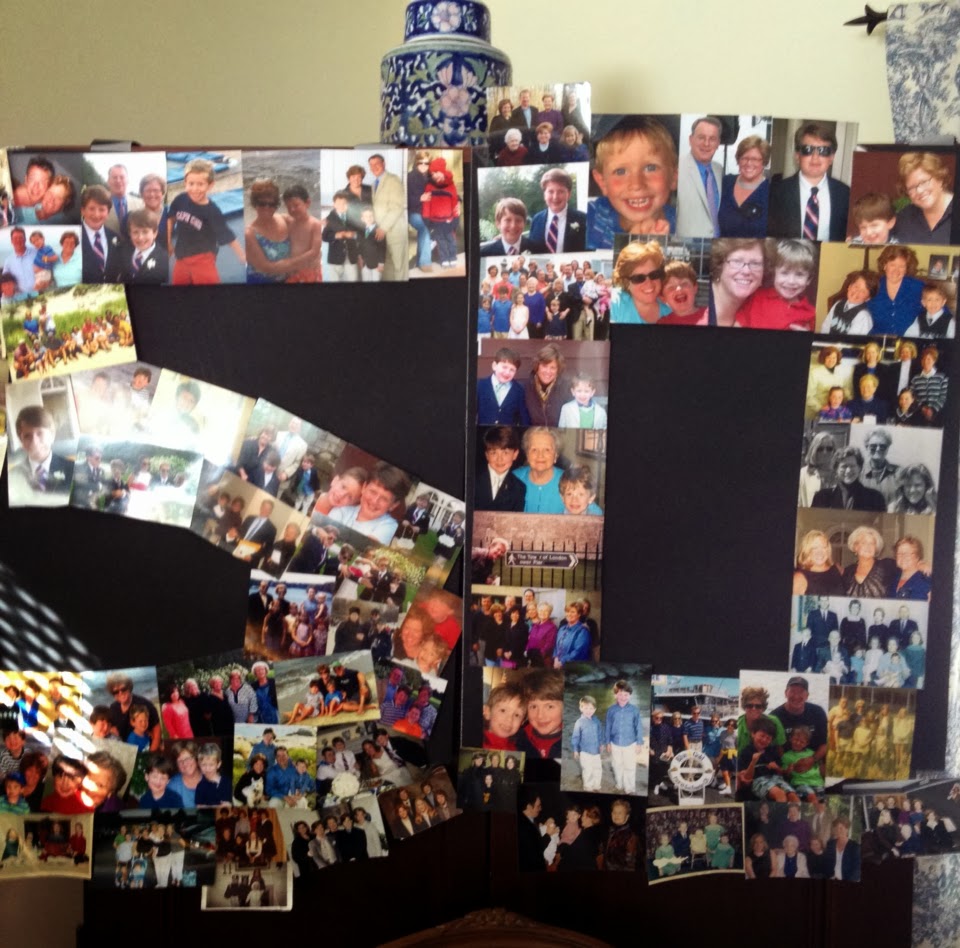
I also printed out some oldies but
 goodies of some favorite pics-
I cut out a big 50 out of foam core 
and glued the pics to cover the numbers- 
then taped it to black poster board-


  Overall, the party was a success-
 she was shocked but loved seeing all her family
 and the special friends in her life-


Happy Birthday Ellen!!

Take care, gotta fly-

Life on Lakeshore Drive
-


House on the Way


Wednesday, November 6, 2013

Wedding Chalkboard Frame


This post is a long time coming-
 the search for the perfect chalkboard for my daughter's wedding!


I told you about my dilemma with the large ornate frame I bought at Goodwill which was going to make the perfect chalkboard for my daughter's wedding- I painted it and let it dry outside only to have it crumble in a flash rain storm!  Oh, the trials of a DIY'er!!

So, I had been on the hunt for a new frame that would do the trick-


I found the perfect specimen, once again, at my fave GW outlet and it was attached to a canvas picture- maybe I'll have less work this time?  Or, maybe not!


A lovely beach scene with a broken fence!

I wiped it down thoroughly, removing dirt and cobwebs accumulated over the years.

Instead of painting the frame first,
 I got my fave spray paint out and went to town-


You get a good shot of the frame itself- not as ornate as the last one, but it would do the trick-


I gave it two good, but light coats and let it dry in the sun...when all of a sudden, I heard some rumbling thunder in the distance- OH NO- not this time and I scooped it up and let it dry inside!!  Two frames for the same project destroyed by Mother Nature- not this time

I painted the chalkboard paint on with a foam roller-
My spray painting with chalkboard paint gets out of control!
I painted the frame white but instead of spray this time, I used my fave Annie Sloan-

Chalk paint on a chalk board sounds like a match made in heaven- 
and the best part was it only cost me $3
And perfect for the wedding!

My uber talented sister used her amazing skills to create exactly what my daughter wanted!


It was a work of art- thanks again Ellen!!

Take care, gotta fly-


Tuesday, June 25, 2013

Win some, lose some!

So, I was telling you about the fabulous frame find I scored at the Goodwill outlet-
It was going to add to the wedding decor, but.....


Sometimes the best laid plans don't always turn out the way you envision!!

The frame was old, and abut wobbly- nothing a little wood glue couldn't fix-
After cleaning it up, I gave it two good coats of spraypaint


My handy dandy garbage cans have always served my spray painting pieces well-
They are sturdy and can take my abuse- so I left it to dry and ran out to do some errands-

The weather in the northeast has been bizarre- sunny one minute, torrential downpours in a flash-
Can you see that rainbow- at least that turned out beautiful!

I'm sure you can guess what happened-  while I was out the rain came down in buckets-
I got home at dark, promptly forgot about my DIY frame project- until the following day at work-I had an aha moment- YIKES- the frame!

At the end of the day, I went to my outdoor crafting area- lol


and I turned the frame over- at first it appeared in perfect shape, but as I lifted it up, the lovely detail molding started to crumble into my hands-   I contemplated repairing it but there was really nothing I could do about it- so, I chalked it up to a project FAILURE!!


So, I'm back out on the hunt for the perfect frame for the wedding!

Take care, gotta fly

Claire